Disclaimer: As an Amazon Associate I earn from qualifying purchases from our site. Thank you for your support!
The sickening feeling when you discover damaged cards never goes away. I once stored a complete vintage set in my basement where it seemed fine at the time. Six months later, I opened the box to find several cards with corner dings, a few with moisture damage, and one beautiful card with a visible warp. Hundreds of dollars destroyed by my ignorance about proper sports card storage.
That painful lesson taught me everything about card protection. Improper sports card storage is silent destruction happening right now in collections worldwide. Cards don’t need floods or fires to get ruined, it’s simple mistakes like wrong sleeves, poor humidity control, or improper stacking cause permanent damage.
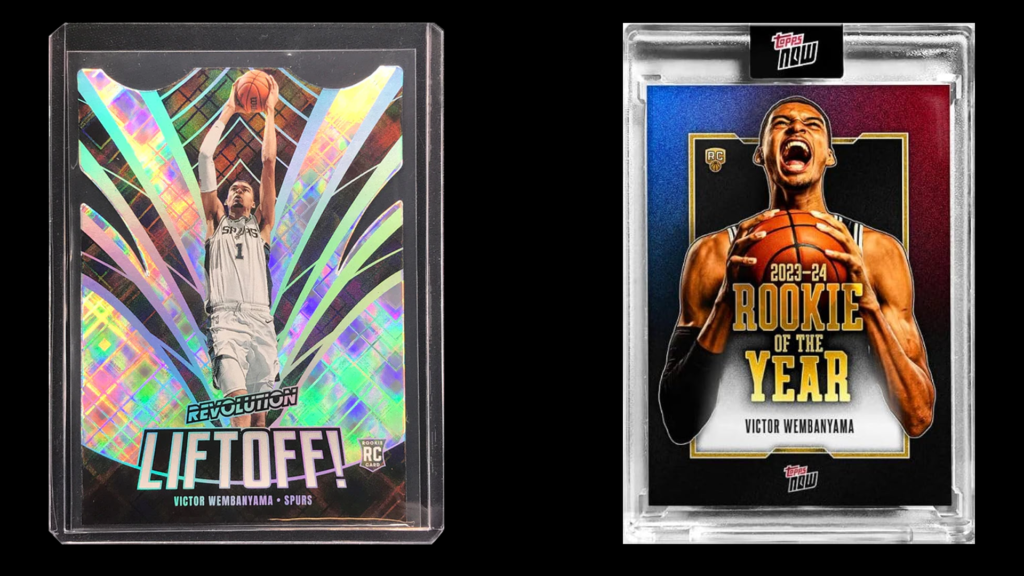
Here’s the reality: a PSA 10 card is worth 4-10x more than a PSA 8 of the same card. That difference comes down to storage and handling. Every corner you ding, every surface you scratch, every bit of warping you allow, you’re literally burning money. Proper protection preserves both condition and value.
This comprehensive guide covers everything: penny sleeves versus top loaders, magnetic holders, storage boxes, binders for set builders, environmental controls, display options, transportation methods, insurance, and long-term preservation strategies. Whether you own 50 cards or 50,000, you’ll learn how to protect your investment properly.
Understanding Card Damage: What Ruins Your Collection
Knowing how cards get damaged helps you prevent destruction. Let me break down the enemies of card preservation.
Corner damage is the most common issue. Corners are vulnerable as any impact dings them. A card sliding against another card in a box? Corners might contact and create minor whitening. Drop a top loader? The corner inside takes the impact. Even microscopic corner issues drop grades from 10 to 9.
I’ve inspected cards that looked perfect to the naked eye, only to see corner whitening under magnification. It happens easily and destroys value instantly. Once corners are damaged, there’s no fix, you can’t unring that bell.
Edge chipping occurs along card perimeters. Edges are sharp-cut during manufacturing and prone to small colour breaks where the white interior shows through. Improper sports card storage where cards shift against each other causes edge wear. Even penny sleeves don’t fully prevent this if cards move inside boxes during handling.
Surface scratches come from multiple sources. Fingerprints contain oils that, over time, can leave marks. Rubbing against other cards creates microscopic scratches. Dust particles trapped between cards act like sandpaper. Even cleaning cards improperly can scratch surfaces. Modern chromium and refractor cards show surface issues more readily than old cardboard stock.
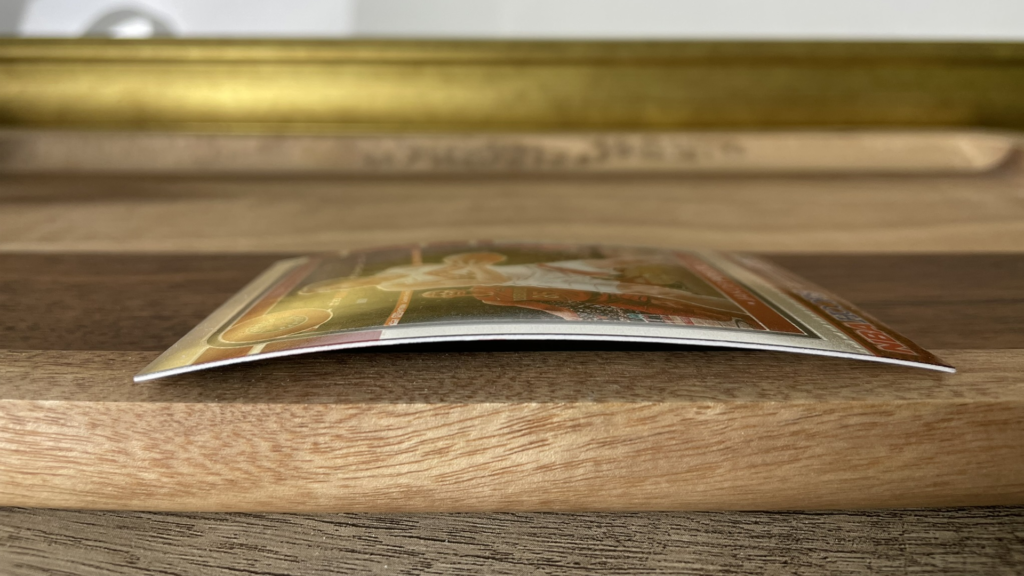
Warping and curling result from humidity and temperature fluctuations. Cards are paper products that absorb moisture from air. High humidity causes cards to expand and warp. Low humidity makes them contract and possibly crack. Temperature changes accelerate these issues. That basement or attic storage? Terrible environments with wild fluctuations.
Sun damage is insidious and it happens slowly. UV rays fade colours over months and years. Cards displayed in sunny windows or under bright lights gradually lose colour saturation. By the time you notice fading, significant damage has occurred. UV damage is permanent and devastating to value.
Residue damage comes from improper tape, stickers, or labels applied to cards or holders. Tape residue is nearly impossible to remove without damaging cards further. Stickers leave marks. Even writing on top loaders with certain markers can cause chemical reactions that damage cards. Be extremely cautious what contacts your cards.
Binder damage is real as the ring indentation from three-ring binders can mar cards over time. Cheap binder pages contain PVC that degrades and damages cards chemically. Even good binder pages can trap cards too tightly, causing edge wear when removing cards. Binders require careful selection and use.
Understanding these damage types helps you implement proper protection. Every sports card storage decision should consider: “How does this prevent corner damage? Edge wear? Surface scratches? Warping?” If you can’t answer positively, reconsider your approach.
Penny Sleeves: Your First Line of Defence

Penny sleeves are foundational for every card in your collection should be sleeved. Let me explain why and how to use them properly.
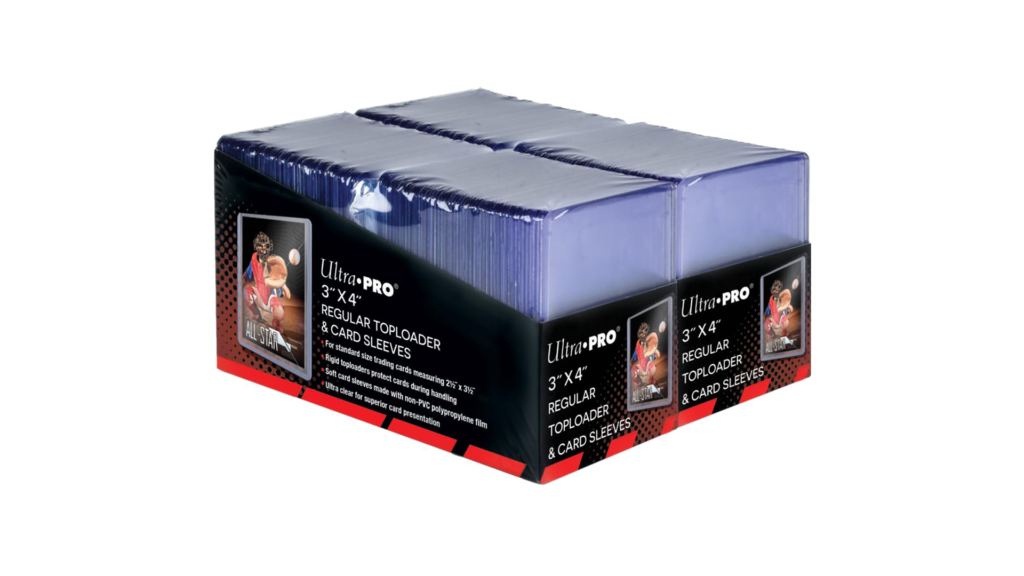
What are penny sleeves? These are thin, clear plastic sleeves that cards slide into. They’re called “penny sleeves” because they cost about 2-5 cents each when bought in bulk. Ultra Pro Penny Sleeves (100ct) run about $5 for 100 sleeves which is extremely affordable protection.
Why use penny sleeves? They protect against fingerprints, dust, minor scratches, and provide minimal handling protection. They’re not rigid, so they don’t prevent bending, but they’re the essential first layer. Think of penny sleeves like underwear that is technically optional but really, you should always use them.
Quality matters with penny sleeves. Cheap sleeves have rough edges that can scratch cards during insertion. They fit too loosely, letting cards shift and get damaged. They yellow over time. Invest in quality penny sleeves from reputable brands like Ultra Pro, BCW, or Dragon Shield.
Proper insertion technique prevents damage. Hold the sleeve open with one hand, slide the card in gently with the other. Don’t force cards – if resistance exists, you’re inserting wrong or the sleeve is damaged. Cards should slide smoothly. Once inserted, the card should fit snugly but not tightly.
Opening orientation matters for some collectors. Some prefer cards to enter from the top (so the opening faces up when stored), others prefer side-loading. Top-loading prevents cards from sliding out accidentally. Side-loading can make insertion easier. Pick whichever works for your sports card storage method.
I use top-loading penny sleeves exclusively. Cards can’t slide out accidentally, and dust can’t settle directly on card faces. This requires slightly more care inserting cards, but the protection justifies it.
Double sleeving involves putting a penny-sleeved card into a second, outer sleeve. This is overkill for most cards but appropriate for expensive cards getting extra protection. The inner sleeve protects the card, the outer sleeve protects the inner sleeve. Some collectors double-sleeve before placing cards in top loaders for maximum protection.
Storage after sleeving still matters. Penny sleeves alone don’t prevent bending or crushing. Sleeved cards still need proper storage in boxes, binders, or rigid holders. Don’t just toss penny-sleeved cards in a shoebox because you need secondary protection.
When to skip penny sleeves? Never for cards worth protecting. The only exception might be absolute bulk commons (literally worth pennies) where sleeving costs more than card values. Even then, if you’re keeping cards, sleeve them. Sleeves cost almost nothing.
Common mistakes include: using damaged sleeves (replace any with tears or rough edges), inserting cards roughly (causes corner and edge damage), buying lowest-quality sleeves to save $2 (false economy), and not using sleeves at all (cardinal sin).
Penny sleeves are cheap, effective, essential protection. Stock up and keep thousands on hand because every new card gets sleeved immediately. It’s non-negotiable for proper collection care.
Top Loaders: Rigid Protection for Your Best Cards

Top loaders provide rigid protection for cards worth more than a few dollars. Understanding top loader selection and use is crucial.
What are top loaders? These are rigid plastic holders that cards (already in penny sleeves) slide into. The rigid construction prevents bending, provides significant crush protection, and offers much better handling protection than penny sleeves alone. BCW Top Loaders (25ct) are inexpensive for a pack of 25.
Standard top loaders (35pt thickness) fit regular cards. This is what you’ll use for 95% of cards. They’re clear, rigid, and have openings at top. Cards in penny sleeves slide in from the top, then you seal the opening with a piece of painter’s tape (never use regular tape as it’s too sticky and damages holders).
Thick top loaders (55pt, 75pt, 100pt+) accommodate memorabilia cards with jersey patches or multiple layers. Thick cards won’t fit standard loaders as you’ll bend cards trying to force them in. Always match top loader thickness to card thickness. Premium memorabilia cards often need 75pt or 100pt loaders.
Quality differences exist. Cheap top loaders have rough edges, fit loosely, and yellow over time. Quality loaders from Ultra Pro or BCW have smooth edges, fit properly, and remain clear for years. The price difference is minimal so buy quality.
Insertion process is straightforward but requires care. Ensure the card is properly penny-sleeved first. Hold the top loader upright, open the top slightly, and slide the sleeved card in gently. The card should slide smoothly without resistance. If you feel resistance, stop or you might be inserting wrong or the loader might be damaged.
Once inserted, seal the opening with painter’s tape or top loader tape. This prevents dust from entering and cards from sliding out. Never use regular clear tape as it leaves residue that’s impossible to remove – unless you use something like Gone Goo which works beautifully to get sticky residue off plastics. But painter’s tape removes cleanly while providing adequate sealing.
Storage cards storage in top loaders protects cards well but consider how you store the loaders themselves. Stack top loaders vertically in boxes rather than laying them flat in piles. Stacking flat creates weight pressure that can damage holders or cards over time. Vertical storage in proper boxes prevents this.
BCW Top Loader Storage Box holds a fair chunk of top loaders vertically. These boxes protect loaders from damage while keeping collections organised. I use multiple boxes organised by player, team, or set.
When to use top loaders? Any card worth $5+ should be in a top loader. This includes all rookie cards of decent players, numbered parallels, autographs, memorabilia cards, and vintage cards. The $0.60-80 per top loader is cheap insurance for cards worth significantly more.
Display benefits are real. Top loaders stand up nicely for desk display, they’re clear for easy viewing, and they protect cards while being viewed. I keep my current PC (personal collection) highlights in top loaders on display shelves. They look great and stay protected.
Limitations include: they’re bulkier than penny sleeves (storage space increases), they cost more (though still affordable), and they don’t provide ultimate protection (magnetic holders or grading is better for expensive cards). For $25-200 cards, top loaders hit the sweet spot of protection versus cost.
Common mistakes: using regular tape to seal (leaves residue), forcing thick cards into standard loaders (damages cards), stacking top loaders flat (creates pressure damage), not penny-sleeving cards before using top loaders (cards can shift and get damaged inside loaders), and using damaged loaders with cracks or rough edges.
I have hundreds of top loaders in use and keep extras on hand. They’re essential for mid-tier card protection or more protection than penny sleeves, less expensive than magnetic holders or grading. Perfect middle-ground solution.
Magnetic One-Touch Holders: Premium Protection

Magnetic one-touch holders provide premium protection for your most valuable ungraded cards. They’re called “one-touch” because they open and close magnetically with one hand and no screws required.
Design features include two rigid plastic pieces held together by strong magnets. Cards sit in recessed areas that prevent movement and contact with holder surfaces. The magnetic closure provides secure protection while allowing easy opening for viewing. Ultra Pro Magnetic One-Touch Holders cost is cheap depending on size and features.
Thickness options accommodate different card types. Standard 35pt holders fit regular cards. 55pt, 75pt, 100pt, 130pt, and even 180pt holders exist for increasingly thick memorabilia cards. Match holder thickness to card thickness so cards should fit snugly in the recessed area without excessive space.
UV-resistant options provide additional protection. Some magnetic holders include UV-filtering plastic that blocks harmful ultraviolet rays. If you display cards where light exposure occurs, UV-resistant holders prevent fading. These cost slightly more but worthwhile for displayed cards.
Gold border holders are premium versions with gold trim around holder edges. They look striking for display and signify the card inside is special. I use gold borders for my PC highlights as it creates visual hierarchy showing which cards are collection centrepieces.
Installation process is simple but requires care. Remove the two magnetic pieces. Place your penny-sleeved card in one piece’s recessed area, centring it carefully. Place the second piece over top and let magnets connect. The card is now securely enclosed. No screws, no tools needed.
One warning: magnetic holders are strong. When pieces snap together, ensure no fingers or card edges are between them as the magnetic force can damage cards if they shift during closure. Hold cards firmly in place while closing holders.
Display advantages are significant. Magnetic holders look professional and premium. They stand upright on stands or lay flat. They’re completely clear for viewing both sides (flip them over easily). They protect while showcasing cards beautifully.
Storage considerations: magnetic holders are bulkier than top loaders. You can’t store as many per cubic foot. They’re also more expensive and adds up for large quantities. Use magnetic holders strategically for your best cards, not your entire collection.
Magnetic Holder Storage Boxes exist for storing magnetics safely. These prevent holders from scratching each other and keep collections organised. Essential if you’re storing dozens of magnetic holders.
When to use magnetic holders? Cards worth $100-500 benefit from magnetic protection. Below $100, top loaders suffice. Above $500, consider grading. The $100-500 range is the magnetic holder sweet spot where too valuable for simple top loaders, not quite worth grading fees, but deserving premium protection.
Advantages over top loaders: better protection (rigid magnetic closure prevents opening accidentally), better display quality (no tape on top), easier viewing (open and close magnetically), and premium feel (they simply feel higher quality). The downsides are cost and bulk.
Comparison to grading: magnetic holders provide similar physical protection to graded slabs at lower cost. However, they don’t provide third-party authentication or condition assessment. For personal collection cards you’re never selling, magnetic holders work great. For cards you might sell, grading adds more value.
I use magnetic holders for my PC cards worth $150-400, just expensive enough to deserve premium protection but not expensive enough to justify $30-75 grading fees. This tiered protection strategy (penny sleeves for bulk, top loaders for $5-100, magnetic holders for $100-500, grading for $500+) optimises protection investment.
Common mistakes: using wrong thickness (forces cards uncomfortably or leaves excessive space), not penny-sleeving first (cards can shift inside recessed areas), letting magnets snap closed violently (can damage cards), storing magnetics improperly where they scratch each other, and using magnetic holders for bulk cards (unnecessary expense).
Magnetic holders represent premium ungraded protection. They’re fantastic for personal collections where you want professional presentation and excellent protection without grading costs.
Sport Cards Storage Boxes: Organising Your Collection

Sports cards storage boxes keep collections organised, protected, and accessible. Choosing and using boxes properly prevents damage while maintaining order.
Standard storage boxes hold 800-5,000 cards depending on size. Storage Boxes are industry standard as sturdy cardboard construction with lids, available in multiple sizes.
Box sizing matters for efficient storage. 800-count boxes work well for smaller collections or for organising by player/team. 3200-count boxes handle larger sorted sections. 5000-count boxes are great for bulk sports cards storage but become heavy when full. Mix sizes based on organisational needs.
Cardboard dividers separate sections within boxes. BCW Card Dividers help you organise by player, team, year, or whatever system you prefer. Without dividers, finding specific cards in large boxes is nightmarish. Dividers cost varies per pack but dramatically improve usability.
Label boxes clearly by using marker or printed labels indicating contents. “Lakers Rookies 2020-2025” or “LeBron James Base Cards” beats unlabelled mystery boxes. Trust me, you’ll thank yourself later when searching for specific cards. I wasted hours hunting through unlabelled boxes before implementing clear labelling systems.
Storage orientation should be vertical for penny-sleeved or top-loaded cards. Cards standing upright prevent weight pressure damaging bottom cards. Laying boxes horizontally and stacking them creates pressure on lower layers over time. Store boxes upright on shelves or floors.
Climate-controlled storage is crucial. Boxes should be stored in climate-controlled areas, so avoid attics (too hot in summer), unfinished basements (humidity issues), and garages (temperature swings). Ideal sports card storage is 18-21°C with 30-50% relative humidity. Consistent conditions prevent warping, curling, and degradation.
Graded card storage requires specialised boxes. Casematix Graded Card Storage Boxes hold 30-40 PSA/BGS/SGC slabs vertically with dividers between each slab. This prevents scratching and keeps slabs organised. Never store graded slabs in regular card boxes as they don’t fit properly and risk damage.
Moisture control helps in humid environments. Silica gel packets placed in sports card storage boxes absorb excess moisture. Rechargeable Silica Gel Packets change colour when saturated (absorbing moisture) and can be recharged in ovens to reuse. Place 2-3 packets per sports card storage box in humid climates.
Box quality varies significantly. Cheap boxes use thin cardboard that crushes easily and doesn’t protect contents. Quality boxes like BCW use thick, corrugated cardboard that withstands stacking and handling. The price difference is minimal per box, so worth it for proper protection.
Organisation systems vary by collector. Some organise by player (all LeBron cards together regardless of year/set). Others organise by year (all 2020 cards together). Some use set-based organisation (complete sets stored together). Pick a system that matches how you access cards most frequently.
I organise using a hybrid system: expensive cards (over $50) stored separately by player in smaller boxes for easy access. Bulk cards organised by year and set in larger boxes. This lets me quickly access valuable cards while maintaining organised bulk sports card storage.
Inventory management becomes crucial as collections grow. Spreadsheets tracking what’s in which box prevent hunting expeditions. Apps like SportCardPro or simple Excel sheets work. Document box contents as “Box 1: Lakers 2020-2023 base cards” saves enormous time later.
Transportation boxes for card shows or trades require extra durability. Monster boxes work but are heavy. Smaller, reinforced boxes or specially designed carrying cases prevent damage during transit. Never transport valuable cards in flimsy boxes as investment in proper carriers prevents disaster.
Common mistakes: overfilling boxes (makes cards hard to remove and browse), storing boxes in poor environments (causes damage over time), mixing valuable and bulk cards (makes finding cards difficult), not labelling boxes (nightmare for retrieval), and using cheap boxes that don’t protect contents adequately.
Storage boxes are unsexy but essential. Investing in quality boxes, proper organisation, and good storage locations protects your entire collection. It’s infrastructure investment that pays off continuously.
Binders: Set Building and Display Solutions

Binders are controversial in collecting as some collectors swear by them, others refuse to use them. Understanding their proper use prevents damage while enabling set building.
D-ring binders are essential for cards. Never use round O-ring binders as the O-rings create pressure marks on cards nearest the rings. D-rings lay flat when closed, preventing ring indentation. Ultra Pro D-Ring Binders can hold 9-pocket pages securely.
Binder pages must be archival-safe and PVC-free. Cheap pages contain PVC plasticisers that chemically damage cards over time – yellowing, sticking, and surface deterioration result. Quality pages like Ultra Pro Platinum 9-Pocket Pages use polypropylene that is safe for long-term sports card storage.
Page configurations vary: 9-pocket pages (standard card size in 3×3 grid) are most common, 4-pocket pages for thicker cards or larger displays, 1-pocket pages for oversized cards or special displays, and 2×2 holders for individual card focusing. Match page type to card type.
Loading cards carefully prevents damage. Slide cards gently into pockets – don’t force them. Tight pockets cause edge wear when inserting or removing cards. Slightly looser pockets are better than extremely tight ones. Cards should slide in smoothly without excessive force.
Once cards are in pages, handle pages carefully. Excessive bending while flipping pages can damage cards. Support pages fully when turning them. Don’t let pages hang unsupported as this stresses cards in pockets.
Binder storage orientation matters. Store binders vertically on shelves like books, not laying flat with other binders stacked on top. Stacking creates weight pressure on cards in bottom binders. Vertical storage prevents this while making binders easy to access.
Set building applications are where binders shine. Complete set builders love binders as they can see entire sets at a glance, identify missing cards easily, and enjoy the satisfaction of filled pages. For vintage set builders, binders provide accessible storage and attractive display.
I build several sets in binders, such as the 2020-21 Topps Chrome rookies, complete Lakers team sets from recent years, and a few vintage sets. Binders let me appreciate complete sets and easily show them to fellow collectors. The visual satisfaction of completed sets in binders is real.
Display advantages include easy viewing (flip through pages to see cards), space efficiency (binders hold hundreds of cards compactly), accessibility (cards are easy to browse), and organisation (sets stay together logically).
Risks and downsides require acknowledgement. Ring indentation can occur even with D-rings if binders are overfilled or stored improperly. Edge wear happens when inserting/removing cards from tight pockets. Cards can stick to pages in humid conditions. Binders dropped or mishandled can damage cards.
When to use binders: set building (completed or nearly-completed sets), lower to mid-value cards ($1-25 each) where binder risk is acceptable, personal viewing collections, and team/player collections you enjoy browsing. Don’t use binders for high-value cards over $50 as they deserve individual protection in top loaders or magnetic holders.
Binder alternatives include storage boxes with dividers for organised browsing without binder risks, or display cases for showing off cards without binder-related damage concerns. These eliminate binder risks while providing organisation.
Common mistakes: using O-ring binders (causes indentation), using PVC-containing pages (damages cards chemically), overfilling pages (creates tight pockets causing edge wear), storing binders flat with weight on them (pressure damage), putting valuable cards in binders (unnecessary risk), and rough handling when inserting/removing cards.
I limit binder use to set building of cards under $15 each. My expensive cards never go in binders as it is too much risk. This balanced approach lets me enjoy set building without risking valuable cards.
Maintenance includes periodically checking pages for damage (replace any cracked or damaged pages immediately), ensuring proper storage conditions (climate-controlled, no sunlight), and handling binders carefully (support fully when opening, don’t drop or bend excessively).
Binders are tools for specific purposes for set building, accessible browsing, and space-efficient storage of lower-value cards. Used properly with quality binders and archival pages, they’re fine. Used carelessly or for high-value cards, they’re risks. Understanding this distinction helps you make smart binder decisions.
Environmental Control: Climate, Humidity, and Light
Environmental factors silently damage collections. Controlling these variables preserves cards long-term.
Temperature stability is crucial. Ideal temperature is 18-21°c consistently. Temperature swings between hot days and cold nights and cause cards to expand and contract, leading to warping and curling. Attics get blazing hot in summer. Garages freeze in winter. Both are terrible storage locations.
I learnt this expensively. Stored cards in my garage for one year. Summer heat caused noticeable curling on several cards. Winter cold and humidity created surface issues. Moving those cards to climate-controlled storage stopped further damage, but the existing damage was permanent. Don’t repeat my mistake.
Humidity control matters enormously. Ideal relative humidity is 30-50%. Below 30%, cards become brittle and can crack. Above 60%, cards absorb moisture, warp, and become susceptible to mould. Coastal climates and basements often have high humidity. Desert climates can be too dry.
Humidity monitors are inexpensive and track temperature and humidity in storage areas. Place monitors in card storage locations and check regularly. If humidity runs high, add dehumidifiers. If too dry, add humidifiers or moisture sources.
I maintain 40-45% humidity year-round in my card storage area using a dehumidifier in humid months and a humidifier in dry months. The consistency prevents warping and keeps cards perfect. The equipment can protect tens of thousands in card values.
Dehumidifiers are essential for humid environments. Small electric dehumidifiers work for cupboards and small rooms. Whole-room dehumidifiers handle larger storage areas. Set target humidity at 40% and let equipment maintain it automatically.
Silica gel packets supplement dehumidifiers for individual sports card storage boxes. These packets absorb moisture directly in boxes. Rechargeable silica gel packets are cost-effective and when saturated (they change colour), microwave or oven-heat them to release absorbed moisture and reuse.
Light protection prevents fading. UV rays from sunlight and even indoor lighting gradually fade card colours. Cards displayed near windows or under bright lights will fade over months and years. This damage is permanent and severely impacts value.
UV-resistant holders and display cases filter harmful UV rays. If you display cards, use UV-resistant holders or keep displays away from windows and direct lighting. Museums use UV-filtered lighting for exhibits so follow their example for your cards.
I display selected cards but always in UV-resistant magnetic holders and away from windows. My display shelf is interior wall-mounted with indirect LED lighting. Cards have been displayed 3+ years with zero fading because of these precautions.
Direct sunlight is card death. Never display cards in windowsills or where sunlight hits them directly. Even brief sunlight exposure begins fading. If you want cards near windows, use UV-blocking window film and UV-resistant holders – and even then, I’d avoid it.
Artificial lighting considerations: LED lights produce minimal UV and heat, making them safest for card display lighting. Incandescent bulbs produce significant heat. Fluorescent lights produce UV. Use LED lighting for any display setups.
Storage location selection requires thinking through environmental factors. Best locations are interior cupboards in climate-controlled living spaces, spare bedrooms with climate control, or climate-controlled storage units designed for valuables. Worst locations are attics, garages, unfinished basements, sheds, or anywhere without climate control.
Seasonal monitoring helps catch issues. Check storage conditions monthly. Has humidity spiked? Is temperature unstable? Address problems immediately. Cards damaged by environmental issues typically show gradual deterioration so catching problems early prevents extensive damage.
Long-term storage for cards you’re holding for decades requires extra vigilance. Multi-year environmental exposure magnifies small issues. That slightly-high humidity you tolerate? Over 10 years it might warp cards noticeably. Perfect environment maintenance pays off exponentially over time.
Safe deposit boxes provide ultimate environmental control for ultra-valuable cards. Banks maintain perfect climate control. Fireproof, flood-proof, theft-proof storage protects your most valuable cards absolutely. For cards worth $5,000+, seriously consider bank storage.
Common mistakes: storing in garages/attics/basements without climate control (causes warping and damage), ignoring humidity (allows moisture damage or brittle cards), displaying cards in sunlight (causes irreversible fading), not monitoring conditions regularly (problems go unnoticed), and using poor-quality storage areas (false economy—environmental damage exceeds storage cost savings).
Environmental control isn’t exciting, but it’s fundamental to preservation. Invest in proper storage locations, monitor conditions, and maintain consistency. Your cards will thank you by maintaining perfect condition decade after decade.
Display Solutions: Showing Off Your Collection Safely

Displaying cards lets you enjoy them daily while sharing your collection with others. Proper display methods prevent damage while showcasing cards beautifully.
Wall-mounted displays create striking presentations. Display shelves with protective fronts hold multiple cards while protecting from dust and handling. Floating shelves work too for mount magnetic holders or framed cards for clean aesthetic. Space cards adequately as crowding causes poor display and risks damage.
Individual card frames work brilliantly for centrepiece cards. UV-resistant acrylic frames mount on walls or sit on shelves. These protect while displaying cards prominently. Perfect for your collection’s crown jewels.
I frame my three most valuable cards and display them in my office. UV-resistant glass, premium framing, proper mounting and they look incredible and stay perfectly protected. Visitors always ask about them. Displaying your best cards creates conversation pieces.
Display cases work for multiple cards. Enclosed cases with UV-resistant glass or acrylic protect while displaying. Desktop display cases hold 10-30 cards depending on size. These prevent dust accumulation and accidental handling while showing off collections.
Rotating displays let you showcase changing selections without permanent mounting. Display 5-10 cards monthly, then rotate in different cards. This lets you enjoy your entire collection over time without overwhelming display space.
Lighting considerations enhance displays while preventing damage. LED strip lights mounted behind or around displays create dramatic effects without harmful UV or excessive heat. Avoid spotlights or bright focused lights that can cause heat buildup.
Security for displayed cards requires thought. Public displays where cards might get touched or stolen need protective barriers. Home displays for family/friends are safer but still consider security. Display cases with locks exist for valuable cards in public settings.
Common display mistakes: displaying in direct sunlight (fading), using improper holders (damage risk), overcrowding displays (looks messy and risks damage), not considering security (theft risk), and using non-UV-resistant materials (fading over time).
Display cards you love seeing daily. Rotate displays periodically to enjoy different cards. Invest in proper display equipment so that your best cards deserve proper presentation.
Transportation: Moving Cards Safely
Moving cards for shows, trades, or sports card storage changes requires careful planning to prevent damage.
Individual card transport for valuable cards should use top loaders or magnetic holders inside protective cases. Top loader storage boxes provide rigid protection during transport. Place boxes inside padded bags or backpacks with adequate cushioning.
Bulk transport requires sturdy boxes with proper packing. Sports card storage boxes work but reinforce with additional tape. Fill empty space with packing material preventing cards from shifting. Cards shifting during transport causes damage – immobilise contents completely.
I once transported a 3,200-count box to a card show without proper packing. Cards shifted during the drive, and several got corner dings from cards impacting each other. Now I pack boxes completely full or add dividers/packing material preventing any movement.
Carrying cases designed for cards provide excellent protection. CASEMATIX Carrying Case has handles and reinforced construction. These protect during transport better than regular sports card storage boxes.
Graded card transport requires extra care and PSA/BGS slabs can crack if dropped or impacted. Wrap each slab in bubble wrap, pack in sturdy boxes with cushioning, and transport carefully. Consider shipping insurance for valuable graded cards.
Vehicle transport should place cards in secure locations. Don’t put them in boots where they might shift and fall during driving. Place on flat rear seats, secured so they don’t slide. Avoid excessive heat, so don’t leave cards in hot cars where temperatures can reach 65°C+.
Shipping cards requires excellent packaging. Use rigid cardboard sandwiching cards, bubble wrap padding, sturdy boxes, and full insurance. For expensive cards, photograph packaging and contents before sealing. Use tracking and signature confirmation. These precautions prevent loss and facilitate insurance claims if needed.
Trade/show transport preparation includes packing only cards you’re willing to trade or sell. Don’t bring your entire collection, just bring relevant subsets. Pack securely in portable cases. Bring protective supplies like extra penny sleeves and top loaders for acquired cards.
Common transport mistakes: inadequate packaging (allows shifting damage), using flimsy boxes (crush risk), leaving cards in hot vehicles (heat damage), not insuring valuable shipments (loss risk), and rough handling during transport (damage risk).
Transportation risks are real. Treat your cards like fragile valuables during any movement. The extra care prevents damage and preserves value.
Insurance: Protecting Your Investment
As collections grow valuable, insurance becomes essential financial protection.
Homeowner’s and renter’s insurance typically cap collectibles at $1,000-2,500 coverage. If your collection exceeds this, standard policies provide inadequate protection. Review your policy’s collectibles coverage as many collectors discover too late that insurance won’t cover their collection’s true value.
Policy costs run approximately 1-2% of collection value annually. A $10,000 collection might cost $100-200 yearly to insure. A $100,000 collection might run $1,000-2,000 annually. This seems expensive until you consider potential loss—one house fire destroys everything uninsured.
Documentation requirements for insurance include detailed inventories of your collection. Photograph every valuable card, record serial numbers for graded cards, maintain purchase receipts, and document current values. Spreadsheets or apps tracking this information are essential. Without documentation, proving collection value during insurance claims is difficult. Insurance companies want proof of ownership and value. Good documentation streamlines claims and ensures full reimbursement.
Updating coverage as collections grow prevents being underinsured. Review coverage annually. If your collection appreciated from $25,000 to $40,000, increase coverage accordingly. Under-covered collections lead to partial reimbursement after losses.
Appraisals for extremely valuable collections provide professional documentation. Professional appraisers assess and document collection value officially. This documentation supports insurance coverage and claims. For six-figure collections, professional appraisals are worthwhile.
Riders or separate policies depend on collection value. Small collections might fit under homeowner’s policy riders. Large collections need separate collectibles policies. Discuss with insurance agents which approach suits your situation.
What insurance covers: fire, flood, theft, accidental damage, and other perils. Specific coverage varies by policy so read carefully. Some policies cover cards at full replacement value, others at depreciated value. Replacement value coverage is worth pursuing.
What insurance doesn’t cover: general wear and tear, gradual deterioration, preventable damage (like leaving cards in sunlight), or loss from selling/trading. Insurance protects against sudden losses, not ordinary collecting activities.
Common insurance mistakes: assuming homeowner’s insurance covers everything (it doesn’t), not documenting collections (makes claims difficult), underinsuring as collections grow (leads to partial coverage), and skipping insurance entirely (risky for valuable collections).
Insurance is risk management. Can you afford to lose your entire collection? If no, get proper insurance. The premiums are modest compared to potential losses.
Your Collection Protection Plan Starts Now
You’ve learnt comprehensive collection protection, from penny sleeves to climate control, from display solutions to insurance. Protection is ongoing commitment, not one-time effort.
The most critical insight? Prevention beats restoration. Once cards are damaged, you can’t undo it. Corner dings, fading, warping, scratches – these are permanent value destroyers. Investing in proper protection from day one preserves condition and value indefinitely.
Start by assessing your current storage. Are cards properly protected? Is your storage environment climate-controlled? Are valuable cards getting protection they deserve? Identify gaps and address them systematically. You don’t need to fix everything immediately, but create an improvement plan.
Budget for protection supplies as they’re investments in your collection. Quality penny sleeves, top loaders, magnetic holders, sports card storage boxes, and environmental monitoring equipment cost money upfront but pay back through preserved card condition and value.
Build good habits. Every new card gets penny-sleeved immediately. Valuable cards go into top loaders or magnetic holders right away. Monitor storage conditions monthly. Handle cards carefully always. These habits become automatic and protect collections long-term.
Consider insurance once your collection exceeds $5,000-10,000. Specialised collectibles insurance provides peace of mind that disasters won’t destroy your investment. It’s risk management that serious collectors need.
Most importantly, enjoy your collection. Protection enables enjoyment and properly protected cards can be safely handled, displayed, and appreciated without fear of damage. Protection and enjoyment aren’t opposing goals; proper protection enables sustainable enjoyment.
Share your collection protection strategies in the comments. What supplies do you use? Where do you store cards? Have you had protection failures that taught lessons? Let’s learn from each other’s experiences.
Welcome to properly protected collecting. Your preserved collection awaits.
Essential Protection Resources
Storage Supplies:
- Ultra Pro Penny Sleeves (100ct)
- BCW Top Loaders (25ct)
- Ultra Pro Magnetic One-Touch Holders
- BCW Storage Boxes (various sizes)
- CASEMATIX Graded Card Storage Box
Binder Supplies:
Environmental Control:
Display Solutions:
- UV-Resistant Display Case
- Card Display Shelf
- UV-Resistant Frames
Community Resources:
- r/sportscards – Storage and protection discussions
- Blowout Cards Forums – Protection advice from experienced collectors
- YouTube – Card protection tutorials and reviews